A beginner's guide to adding custom CSS in Squarespace 7.1 + simple CSS tricks I use to make websites stand out
My first website was on WordPress! Even though I absolutely loved having the freedom to add all sorts of customizations, it quickly got too overwhelming.
When I started my business, I was looking for something simpler. Then I found Squarespace. Even though the drag-and-drop functionality is super useful, to be honest I am not a fan of templates.
I believe your website should showcase your unique personality.
No two people are the same so why should their website look the same?
I'm glad Squarespace offers a wide range of customization options and the ability to use CSS (Cascading Style Sheets) customization. CSS allows you to modify the appearance and layout of your Squarespace website, giving you the ability to create a truly unique online presence. Before we look into some very simple CSS hacks you can use to enhance your website, here is an overview of what CSS actually is. (and what it’s not)
HTML, CSS, and JS — A simple analogy
Imagine you're building a house (webpage).
HTML is like the blueprint or framework of a house. It determines the layout and where everything goes.
CSS is the paint, furniture, and decorations that make it visually appealing.
JavaScript (or JS) is what you use to add smart features, such as lights that turn on when you enter a room. (how cool!)
To put it in terms of a webpage, HTML defines the content and structure, CSS makes it look good, and JavaScript adds interactive features to create a complete and engaging web experience.
So, what is CSS?
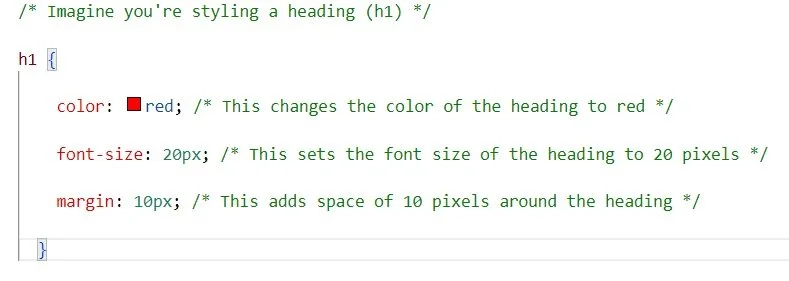
A simple CSS code consists of selectors, properties, and values. Let's break down the anatomy of a basic CSS rule:
Selector: Think of the selector as the item you want to style, like a heading (h1), a button, or a paragraph.
Property: Properties are like the aspects of the item you want to change, such as its color, size, or spacing.
Value: Values are the specific settings you give to the properties. For example, you can set the color to red, the size to 20 pixels, or add space of 10 pixels around an item.
Before you start customizing your Squarespace website with CSS, it's essential to understand how CSS works and interacts with your site's HTML elements.
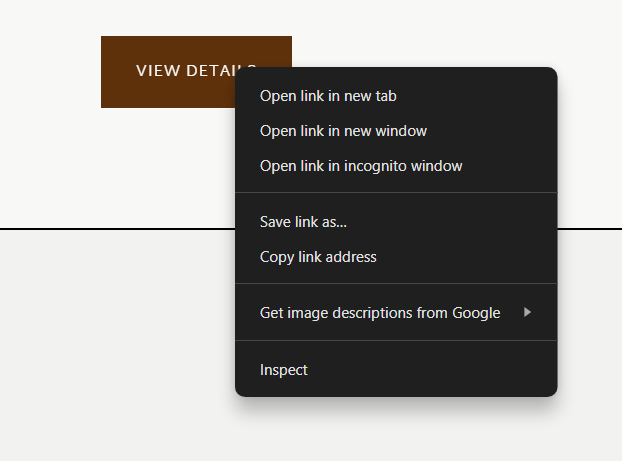
Most modern web browsers have built-in developer tools that allow you to inspect elements on your webpage and see their corresponding CSS styles. Right-click on any element and select "Inspect" to see its HTML structure and associated CSS styles.
This knowledge will be invaluable as you start making your customizations.
Still with me? Great!
Now let's add some CSS to your Squarespace site.
How to add custom CSS to Squarespace?
The easiest (and my favorite) way to add custom CSS to Squarespace is by using the CSS Editor.
To access the CSS editor in Squarespace, navigate to:
For Squarespace 7.1 : Website>Website Tools > Custom CSS
For Squarespace 7.0: Website>Pages > Website Tools > Custom CSS
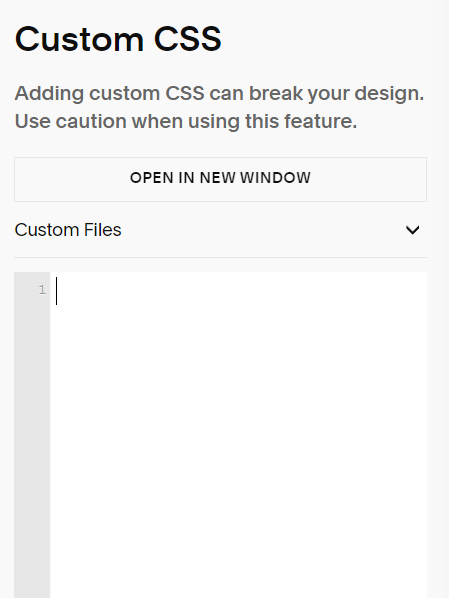
The CSS editor window looks something like this:
Remember the selector we talked about above, it’s now time to select what you want to target.
There are three main types of selectors:
Element Selector:
Think of this as a general style that applies to a certain element type. For example, you might want all paragraphs on your site to have a specific font. These selectors look like div {..}, a{...}
ID Selector:
Now if you want to just edit the font of only one paragraph, you can give it a unique id and edit it in CSS. Squarespace provides unique ids to each of it’s block elements. The SquareSpace ID Finder Chrome Extension is super useful for finding the block ID for targeting specific content blocks.
Class Selector:
Consider classes as labels you can give to certain elements. If you want some paragraphs to have a different style than others, you can give them a class, and the class selector helps you style just those specific paragraphs.
Simple CSS snippets I love adding to websites
Making small CSS tweaks is the easiest way to make your website stand out. Here are some of my favorites. (Note: The code is for Squarespace 7.1)
1. Remove underline from links:
To remove for the links on your whole site use:
a {
    text-decoration: none;
}

But if you’re just looking to add a footer menu without those pesky underlines, use this:
footer a {
    text-decoration: none !important;
 }

Without CSS

With CSS
2. Highlight text on hover:
Small animations can sometimes make your website more fun and engaging. I really love this little tweak that makes your links more interactive.
Here’s the code to do this:
/* Add Hover Effect to links*/
a:hover {
    background-color: #ffffff; /* Hover background color */
    color: #3498db; /* Hover text color */
    font-style: italic /* Make font italic */
}
These changes will affect the links on the entire site. If you want to make changes to just the footer, use this code:
 /* Add Hover Effect to only footer links*/
footer a:hover {
    background-color: #ffffff; /* Hover background color */
    color: #3498db; /* Hover text color */
    font-style: italic /* Make font italic */
}
Add custom CSS in Squarespace - Example video of how the highlight on hover effect looks
3. Add a vertical line:
If you’re like me and you love organized layouts, vertical lines can do wonders to make your design clean without making it overwhelming. Unfortunately, Squarespace has no built in option to add a vertical line. Luckily we can use CSS to create and style a vertical line
Here’s how to do that:
Method 1: Create a vertical line using HTML & CSS
Go the the section you want to add the line in. Click on “Add Block” and Select Code
In the HTML code block add:
<div class="vertical-line"></div>
You have just created a vertical-line class. Adding this won’t make the line show up. To see the line you need to style this vertical line in the CSS editor.
.vertical-line {
  background: #000000; /* You can change the color (#000000) as needed */
  width: 2px; /* You can change the width (2px) as needed */
  height: 100px;  /* Adjust the height of the line as needed */
  margin-left: -1px; /* Half of the width to center the line */
}
Note: If you want to have vertical lines of different sizes or properties, like different colors, etc. you will need to create classes with different names for each type of line.
Method 2: Create a vertical line class using the horizontal line block
Though unconventional, this method is simple and only needs CSS. Here’s how to create a vertical line using a horizontal block:
To use this method, make sure you find the block ID of the line using the Squarespace ID finder tool mentioned above.
#block-1234567890 //replace this with the block id for line
{
    transform: rotate(90deg)
}
We are using the transform property to rotate the existing horizontal line to make it vertical! It’s that simple!
You need to add an additional condition if you want the vertical line to not appear on mobile screens. The complete code will then be like this:
@media screen and (min-width: 768px) {  /* Ensures the line is only shown for desktop screens*/
#block-1234567890 //replace this with the block id for line
    {
        transform: rotate(90deg)
    }
}

Vertical lines are an easy and clean way to divide information
There you have it! You have successfully added some cool CSS to your website! It’s fun, isn’t it?
Learned something from this post, don’t forget to this post with friends who use Squarespace! Thank You!